
Catherine Ward’s debut picture book, The Emerald Forest, will help children to learn about the amazing relationship between a mother orangutan and her young.
They’ll also learn about orangutans’ shrinking rainforest habitat, and the role of conservationists who are working to save these incredible creatures and the place they call home.
Why not share the story with your young learners, before trying some or all of these crafty ideas, inspired by the book?
You will need:
● Cardboard tubes
● Brown paper
● Scissors
● Green and brown paint
● Paint pots / tray
● Paintbrush
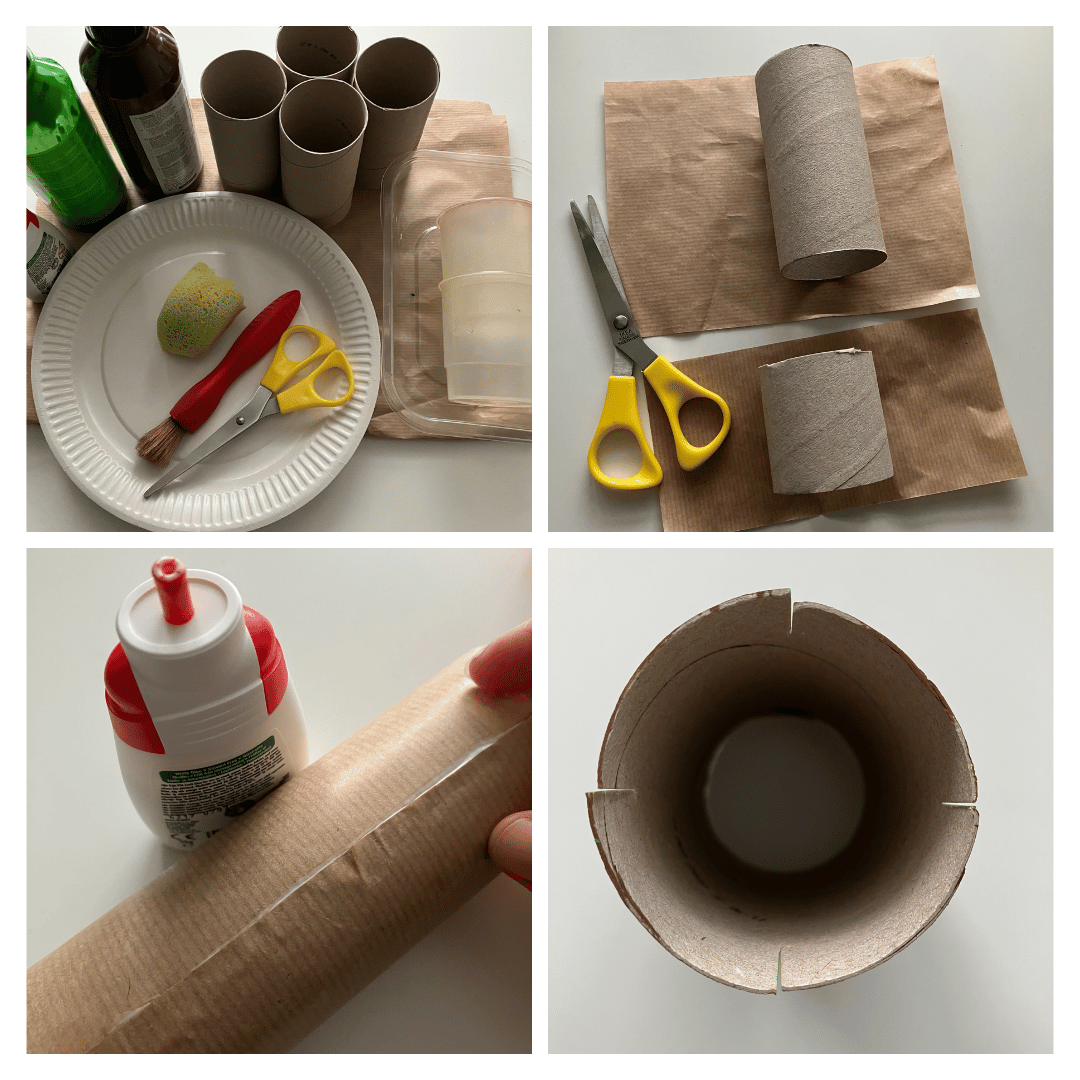
Step 1:
Select a cardboard tube. Cut your brown paper so that it is approximately 2cm longer than your tube and wide enough to wrap all the way around (if you don’t have any brown paper, you could paint your tubes brown instead).
Step 2:
Glue along one edge of the paper, fixing it to the tube. Winding tightly, wrap the paper around the tube and fix with more glue to hold it in place. Tuck the ends of the paper into the tube.
Cut down into the top edge of each tube approximately 2cm. You need to make four cuts at the equivalent of 12 o’clock, 3 o’clock, 6 o’clock and 9 o’clock, as shown in the picture.
This creates the tree trunk. Repeat with tubes of a variety of lengths, to make trees of different heights.
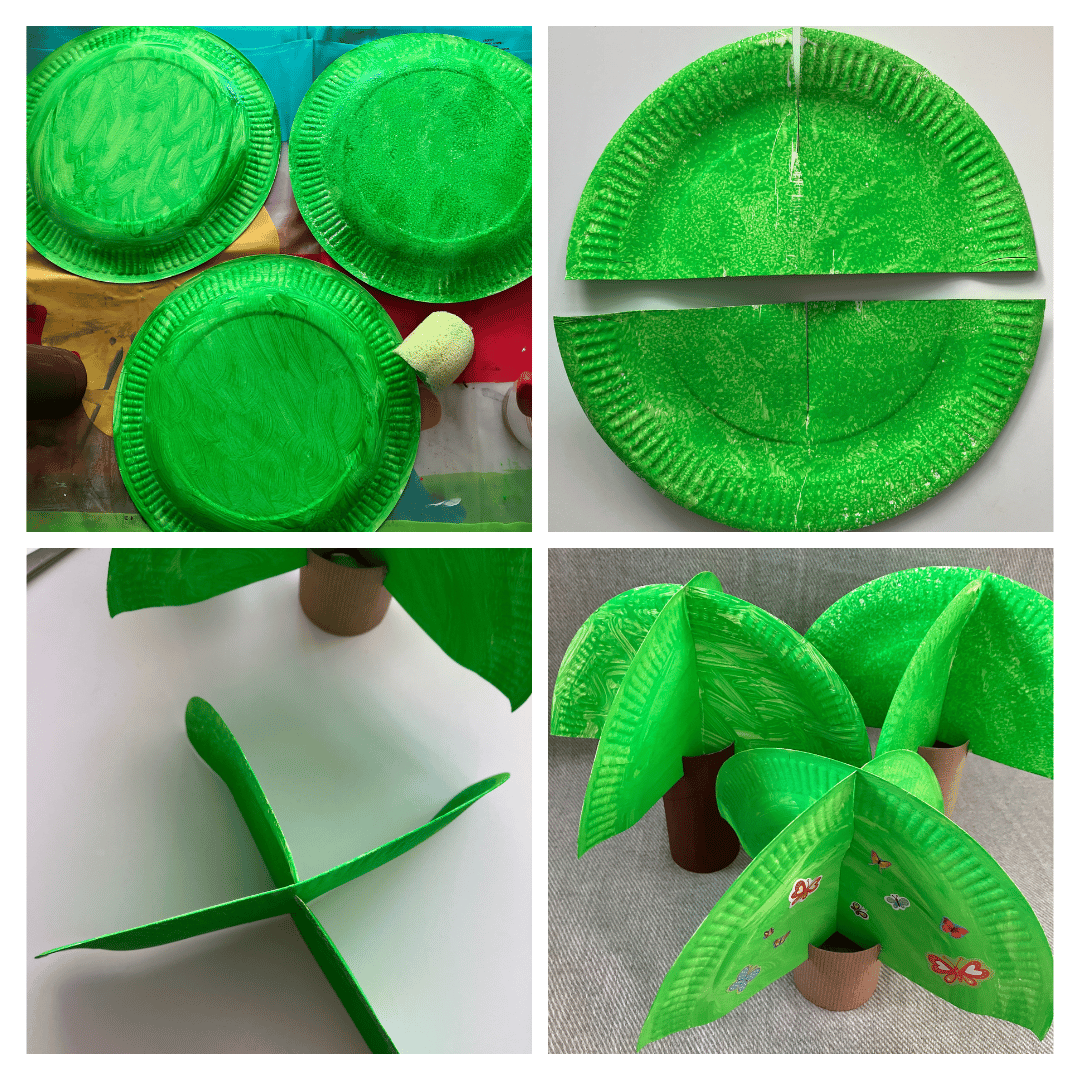
Step 3:
Paint your paper plates on one side using either a brush or a piece of old sponge. You can create different effects to add variety to your treetops. Allow to dry and then repeat on the other side.
Step 4:
Cut each plate in half. Make a cut in one half from the outer edge about halfway towards the middle, then make a cut in the other half from the straight edge about halfway towards the circumference, as shown in the picture.
Push the two halves of the plate together to create a cross shape. This creates the top of the tree.
Step 5:
Taking your treetop, push each quarter of the tree down into each of the four cuts you made in the cardboard tube tree trunk. Now your tree is finished! If you like, you could decorate it with butterflies or birds.
Repeat until you have enough trees to make your own mini jungle.
You will need:
● White paper
● A pencil
● Paints (whatever colours you like)
● Paintbrushes / pieces of sponge
● A tray
● A black pen or crayon
● Scissors
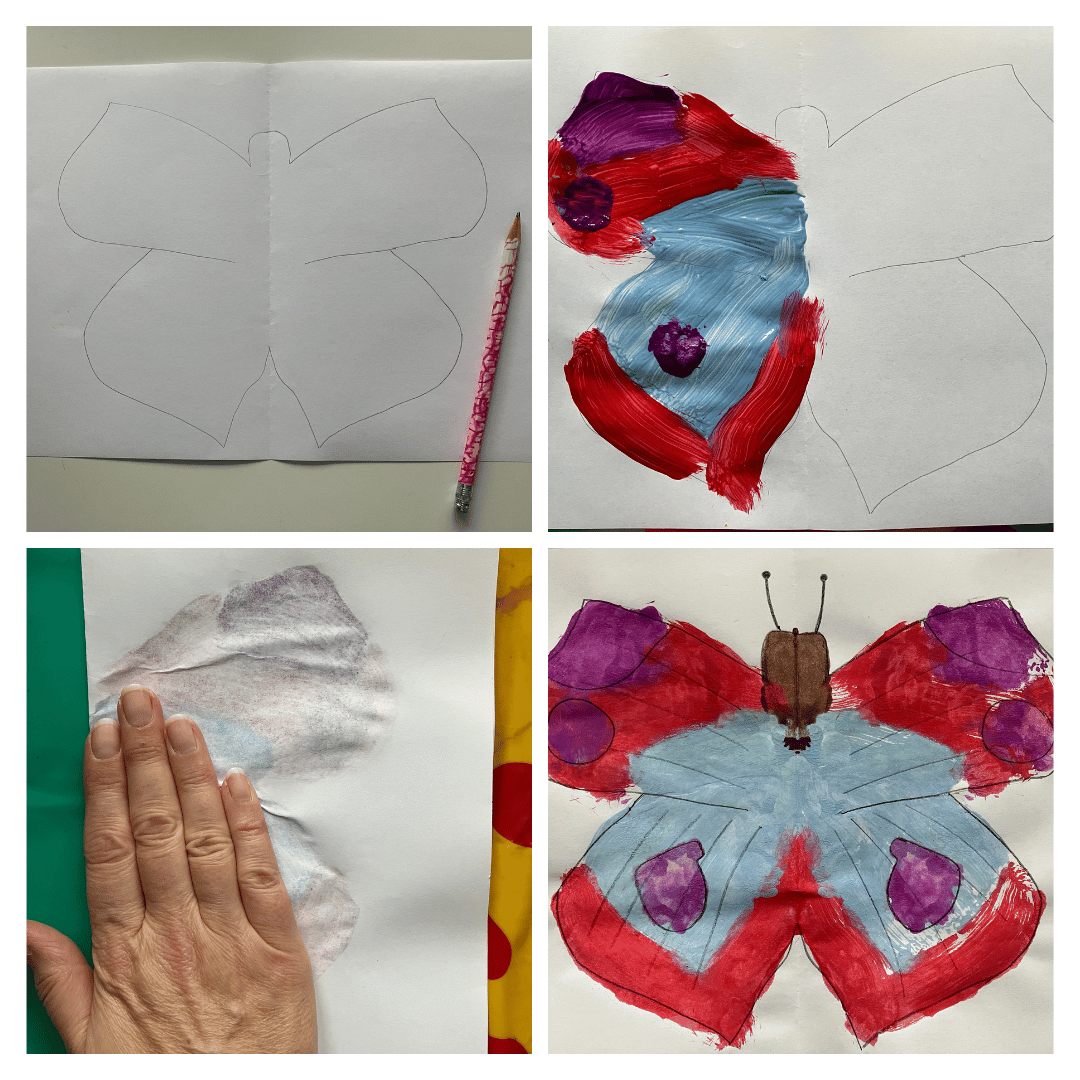
Step 1:
Fold the piece of paper in half. On one half, draw the outline of half a butterfly. Repeat on the second half, to create a mirror image
Step 2:
Choosing your own design, paint one half of the butterfly using either paintbrushes or pieces of sponge - make sure you apply a good amount of paint at this stage.
Step 3:
Refold the paper and press down firmly to enable paint to transfer onto the second half of the paper.
Step 4:
Unfold the paper to reveal your mirror image butterfly. Allow to dry. Using a black pen or crayon, draw around the patterns, to add definition to the butterfly. Draw on antennae and cut out.
You will need:
● A large sheet of white paper (A3 or larger)
● Orange, cream, white and black paper
● Orange and green paint
● Paintbrushes
● Glue
● Scissors
● A pencil
● A black pen or crayon
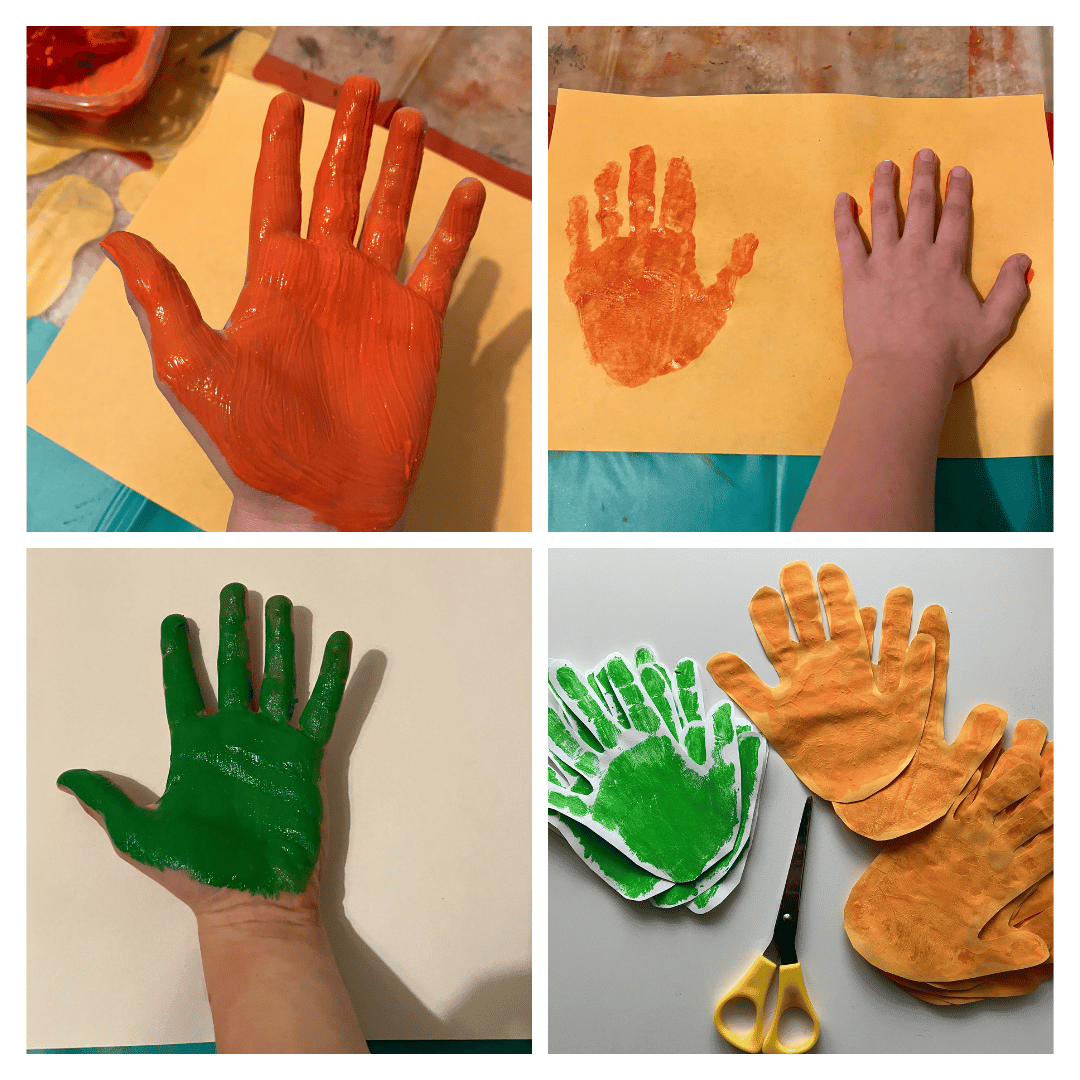
Step 1:
Using the orange paint, paint your hand and press down firmly onto the orange paper. You will need 12-14 orange handprints, depending on the size of your hand. Wash your hand thoroughly.
Using the green paint, paint your hand and press down firmly onto the white paper. You will need six handprints. Wash your hand thoroughly. Allow the handprints to dry completely.
Step 2:
Cut out all the handprints.
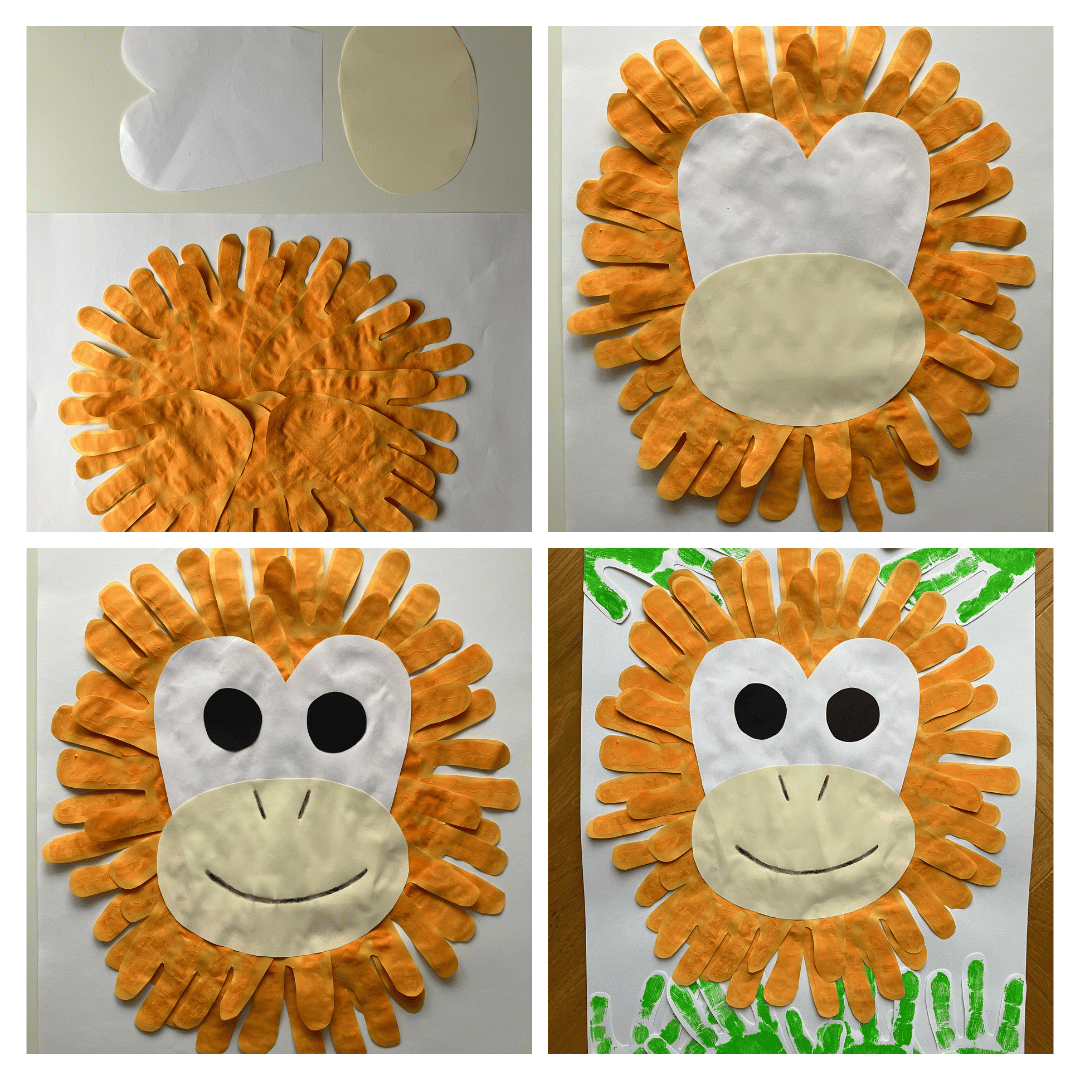
Step 3:
Glue the orange handprints onto the large sheet of white paper to create an oval. Using white paper, cut out a heart with the bottom cut off. Using the cream paper, cut out an oval.
Step 4:
Stick the white and cream face shapes on top of the orange handprints. Using the black paper, cut out 2 circles and glue these onto the upper part of the face to make the eyes. Using a black pen or crayon, draw nostrils and a mouth onto the lower part of the face.
Finally, stick the green handprints in the top corners and along the bottom of the picture.
The Emerald Forest, by Catherine Ward, illustrated by Karin Littlewood, is published by Otter-Barry Books Limited. Follow Catherine on Twitter and Instagram.